Saturday 27 April 2013

Untried Challenge: Day 3

It's day 3 of the Untried Polish Challenge hosted by Jonochi at Just Add Polish!  Today's challenge is to use three colours.

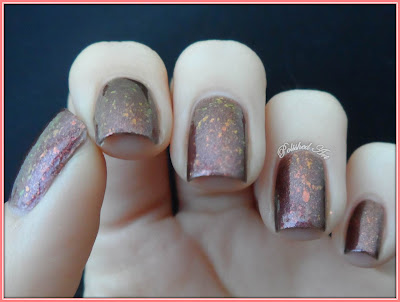
I picked out three polishes with similar tones (that would hopefully go together!) and then applied them to various nails in a haphazard sort of way.

Untried-Challenge-Day-3-Three-Colours-sinful-colors-calvin-klein-hits-specialita-glitter-forte

I don't know what I'm doing wrong, but my lightbox killed this manicure!  Any tips would be very much appreciated.

Anyhoo, the glitter on my thumb and little finger is Hits Folk Rock.  The shimmery browny-reddy polish is Sinful Colors Mercury Rising, and the black with gold microglitter is Calvin Klein Tutu.

And here's a slightly horribly lit picture that shows of the Sinful Color much better.

Untried-Challenge-Day-3-Three-Colours-sinful-colors-calvin-klein-hits-specialita-glitter-forte

So pretty...  And to think it was only £1!

Every single one of these polishes is stunning.  No de-stashing for me today!

Don't forget to take a look at all the other ladies manicures today :)

Jonochi at Just Add Polish

Masha at Lost In Lacquer
Raine at Lacquer Lily
Amy at Fancy Side
Lizajane at Organic Neglect
Blueberry Pie at Blueberry Nails
Kristina at Lacquer Fetish

New Technique: Jelly Sandwich

Ah, it's the weekend! We were promised horrible weather, but it looks pretty nice outside to me! I'm going to take a stroll in to town later (this will undoubtedly result in some nail polish being purchased...).

So last week you voted for me to give a jelly sandwich a go. I've dodged this technique for quite some time, the main issue being that I don't own any jellies...

But anyway, that's not going to stop me! I decided to use China Glaze Manhunt - when I first used that I thought it had jelly-like qualities, it's quite glassy and squishy-looking.

New-Techniques-Jelly-Sandwich-China-Glaze-Man-Hunt-Barry-M-hologram-2true-glitterati-shade-3

After two coats of Manhunt, I used two coats of Barry M Hologram, which is made up of medium holographic silver hexes.  I was going to add one more coat of Manhunt to finish off, but then panic struck.  Would it be too opaque?  Or maybe too streaky?

So I cheated. Instead I finished off with a coat of 2true Glitterati Shade 3, which is essentially a pre-made jelly sandwich.  You can still see the later of Barry M glitter through it though, so I think overall it ended up being very pretty.

I can't believe how difficult this was to photograph though!  It was super squishy-looking and shiny, but the photo has just made it look totally flat!  Any tips for how to capture this sort of look well on camera?

Are you a fan of jelly sandwiches?  Or would you go for quick cheat like me...?

Pop on over to my Facebook page to vote for which technique I should give a go next week :)

Thursday 25 April 2013

Untried Challenge: Day 2

Aloha!

This (well, yesterday) is day 2 of the Untried Polish Challenge!  The theme is two colours.  I really struggled with this, hence it being a day late.  I've got most of my other polishes picked out already - you tell me to use the prettiest/cheapest/oldest and that's easy, but just two colours?  Argh!  To many choices!

So here's what I settled on in the end.


This is Nails Inc Hans Road and China Glaze Luxe and Lush.  It didn't photograph very well...I'm losing faith in my light box!

Hans Road is a really really orange-toned red, packed full of shimmer.  Very nice for summer, but I don't think it's really for me (that'll be another free polish for my mum!).  I can't say I'm overly fussed on Luxe and Lush either...but it's my only flakie topper, so I shall be keeping hold of this in case of a flakie emergency.

What do you think of these polishes?

Don't forget to take a look at the other ladies taking part in the challenge!

Jonochi at Just Add Polish

Masha at Lost In Lacquer
Raine at Lacquer Lily
Amy at Fancy Side
Lizajane at Organic Neglect
Blueberry Pie at Blueberry Nails
Kristina at Lacquer Fetish

Monday 22 April 2013

Battle of the Nail Art Pens

The release of Barry M's new nail art pens has sent most of the polish-addicted population into a bit of a frenzy!  I'm certainly not alone in going and buying multiple colours in excitement, before actually trying one out to see if it was any good!

So are they any good?  At £5 a pop, they're not the cheapest option.  So I thought it would be useful to do a little comparison post for you of all (well, perhaps not all!) the different nail art pen options that are out there.

The Contenders:


From left to right we have a standard 2-way nail art pen/striper brush, a Sharpie, Barry M and a pen from Born Pretty Store.  I'll use the same order all the way through :)

The Nibs:

The 2-way nail art pen has a fine metal tube (for want of a better word) and you need to give the bottle a little squeeze the keep the polish flowing.

The Sharpie has quite a large, softish tip, just like any other marker pen.  This one is a double ended pen, so it also has a really fine tip that you can use for those little details.

The Barry M and BPS pens are both pretty similar.  They both have a solid nib, and you have to pump it a few times to get the polish flowing.  I say polish...it isn't quite polish, no idea what it is but it's a little thinner and easier to wipe off if you make a mistake.

The Battle:

I devised this highly scientific test to compare all the pens.

battle-of-the-nail-art-pens-comparison

All nails were prepped with two coats of polish and a coat of Seche Vite, then allowed 10 minutes to dry to minimise drag.

2-Way Nail Art Pen:

So this is what I think would generally be regarded as a standard nail art pen.  Screw off the top and you've also got a striper brush.  There's a few brands that do pens of this sort, but I got this one as part of a massive set on ebay.  If you buy them in bulk and from China, you can get them pretty stupidly cheap.  If you buy one on it's own from a UK seller, then you're probably looking at about £2.50.

battle-of-the-nail-art-pens-comparison-2-way-striper-brush

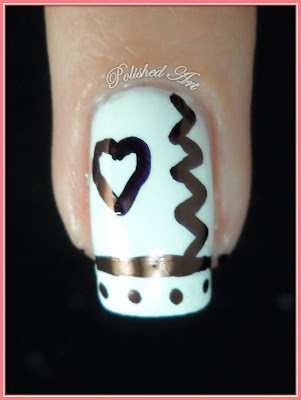
This pen's a little tricky to control.  Since you're having to squeeze the polish out, it's pretty difficult to get a line of uniform thickness.  Dots are easy to do, although they aren't the smallest.  You can see on the corners of the zig zag and the joins  on the heart that there's a little too much polish there.  Basically this is because the polish keeps flowing, so when you stop for a second to change direction you end up with a slightly thicker blob.

Sharpie:

One day I painted a mermaid on my nails (you can see her here).  I became a little fed up with my nail art pen above when I couldn't get the lines as thin as I wanted them, so I decided to buy myself a pack of Sharpies to try out.  You can pick up individual pens for just over a pound, or if you want some more colours then they're also available in packs of various sizes.

battle-of-the-nail-art-pens-comparison-sharpie

Obviously control of this is great, what with it just being a pen!  It's a little thick, although if you're careful to just use the tip you can get thinner lines, and the dots are pretty neat and consistent.  It's also lovely and opaque, and no issues with dragging.

Barry M:

The man (well...pen) of the moment!  These cost £5 each, and there are four colours available.  I'm sure you all know all of this lol.

battle-of-the-nail-art-pens-comparison-Barry-M

The more solid nib on these last two pens does mean that you need to give your base layer a little longer to dry than if you were using the last two, otherwise it'll just drag it all over the show.  Not quite as opaque as the previous two pens, but super easy to control and the lines are thinner.  The pen moves really nicely over the nail.  Watch out for too much polish running down the nib and ending up with a big blob of polish though!

Joyme from Born Pretty Store:

I received this pen for review before there was any mention of Barry M pens.  These cost $5.99 (erm..about £4?  That's toally a guess) and are available in the same colours as the Barry M pens, plus yellow and red.

battle-of-the-nail-art-pens-comparison-born-pretty-store

This is pretty much the same as the Barry M pen, but with a thinner nib.  This means you can get even smaller detail, although it does also mean this drags your base layers a little more.  Look at the size of those dots - super tiny!  I did have a little trouble this time with the paint not quite coming out fast enough, so I did go back over the first line a few times until it got flowing nicely.

The All-Important Top Coat Test:

So you've just finished the most beautiful design ever on your nails.  It's taken you well over an hour, but heck, your nails look fab!  Totally worth it, and you were totally right to spend all that time doing your nails rather than cleaning the bathroom.

You're almost done!  Just need to pop on a coat of your favourite top coat!

But then, smearing strikes.  

I.  Hate.  Smearing.  It's a little bit devastating.  Sometimes I'll take a picture of my nails before I top coat, in case it all goes wrong...

My nails all had 15-20 minutes to dry (I was faffing about with something or other).  I used one coat of Seche Vite.  I applied it the way I normally would - plenty on the brush, but not being particularly careful not to touch my nail with the brush.

battle-of-the-nail-art-pens-comparison-top-coat-smearing

The 2-way nail art pen and Sharpie both get a big thumbs down.  The thickness of the first means that even if you give it a good amount of time to dry, it'll still be wet, meaning it gets dragged down your nail.  As for the Sharpie...if you give it loads and loads of time to dry, and are super careful, then sometimes it doesn't smear. A little hit or miss for my liking though.

Barry M and BPS?  Thumbs up and a very happy blogger!  I guess it's down to whatever the formula is of that paint in the pen, but these were not budging.  And actually the BPS pen only had about 5 minutes to dry before I went in with the top coat (I originally did it in white paint, but changed it to black so you could actually see it!)

So, my winner is...

battle-of-the-nail-art-pens-comparison

Good old Barry and his M.  The 2-way and the Sharpie didn't stand a chance with their thick lines and smearing.

Why not the BPS pen?   Hmm...well I'd like to try it in black, that would be more of a fair test.  But the fact that I had to go over some lines a few times because the polish was coming out too thin (whoever thought I'd be complaining about something like that??) means it shall have to make do with runner up.

That being said, if you're feeling hard done by because you can't get Barry M where you live, the Born Pretty Store pen is definitely a great alternative (you can see them here if you're interested).

But yes, well done Barry!  Good job I bought the white and pink as well :D

Sunday 21 April 2013

Untried Challenge: Day 1

Ah, Monday tomorrow!  Boo!  The weekend seriously needs to be a day longer.  I do enjoy my job, I just haaate waking up before 10am lol.  I know, I'm lazy...

Anyhoo, I'm starting a new challenge!  Jonochi from Just Add Polish is hosted this fab Untried Polish Challenge.  It's a post every three days (which I should be able to keep up with!) and a great opportunity to try and use some of those polishes that have been neglected.

So this morning I sat and went through all my polishes, trying to remember which ones I haven't used.  It is possible that one or two of these have been used for a small nail art detail somewhere, but as far as I can remember, they haven't been.

Here's what I have to play with:


Definitely more than the 19 that are required to complete the challenge...  There's quite a mixture in there - Barry M, Nails Inc, loads of OPI minis, China Glaze, Ninja Polish, W7 and so on and so forth.  Plenty to choose from!

Here's the challenge prompts:


So for today's one colour manicure I used...erm...well, I'd call both of these purpley pink.  Totally one colour.

Untried-Challenge-Day-1-One-Colour-manicure-using-OPI-Sparrow-Me-The-Drama-Hits-Specialita-Pega-Pega

This is OPI Sparrow Me The Drama and Hits Specialita Pega Pega (available from Sally Magpies).  Then I made a poor attempt at stamping, and added a few rhinestones to finish the look off.

Pop on over to take a look at all the other ladies participating in the challenge:

Jonochi at Just Add Polish
Masha at Lost In Lacquer
Raine at Lacquer Lily

Thursday 18 April 2013

Matte Leopard Print

This is my 200th post - woohoo!

Unfortunately, I'm not exactly celebrating it in style.  I had a total creativity block and couldn't think of ANYTHING to do on my nails.  I wanted to do something to try out my Barry M nail art pens but...nothing...

So I decided to just go for some good old leopard print.

Matte-leopard-print-nails-with-Barry-M-nail-art-pen

I used OPI Skull and Glossbones with Barry M Grey for the spots.  I used the Barry M Nail Art Pen in Black to outline my spots.  I decided to mattify using Rimmel Pro Matte Top Coat.

If you'd like to have a go at nails like this, there's a step-by-step tutorial, which you can find in the Tutorials tab at the top of the page :)

I'm going to say something a little controversial here...  I didn't think the pen was great.  See where it looks like I tried to squeeze too many spots on to my middle finger?  That's because a huge blob of polish came out of the pen, so I rescued it by adding a grey spot in the middle!

That being said, I had a little go scribbling on my nails with the pink pen, and it was fab.  I think for leopard print I prefer thicker, messier lines, so actually having more control makes for worse leopard print...  That's just my opinion anyway.

Over the weekend I'm going to put together a comparison of the four different types of nail art pens that I have.  If there's any particular aspect of their use that you'd like me to compare, let me know in the comments :)

A couple of other things!  I remembered that I forgot that I was working through my list of new techniques!  Pop over to my Facebook page to vote for which technique you'd like to see my try out this week.  Jelly sandwich is winning at the moment, and I don't really want to do a jelly sandwich, so please vote and save me!  Or seal my fate.  Either one.

Also, for any Instagram users, I'm attempting to use that now.  I don't really get how it works, but my username is polishedart.  I'll add a button on the sidebar just as soon as I can work it out...  Does anyone know if I can set one of my pictures on there as my profile picture, because it doesn't seem to be an option? Also, if you have an Instagram account, let me know!  I'm not following anyone yet!

Tuesday 16 April 2013

Viva La Nails Water Decals

Here's the final product I have to show you from Viva La Nails!


These fab little water decals come in a pack of 20 (there are 5 more that you can't see!).

These work just like normal water decals - soak in water for about 15 seconds, then slide them off the backing paper and place on your nail.  They're easy to move about until they dry, so you don't have to worry about getting them perfectly positioned first time round!

They're also thin enough that you can't see the edges (as you'd expect from water decals) but I didn't experience any tearing or other nastiness.

OPI-Don't-Pretzel-My-Buttons-and-Orly-Halo-gradient-with-Viva-La-Nails-water-decals

I used them over a base of OPI Don't Pretzel My Buttons, with a little Orly Halo gradient.  I love that these all have slightly different designs, it just makes it look that but more interesting, and you don't have to worry about getting every nail lined up the same!

You can check these water decals out here.  They're a bargain at £1.99, and there's also loads of other designs to choose from, so you might as well have a look while you're there.  It'd be rude not to...:p

Sunday 14 April 2013

Zig Zag Glitter

Hello everyone, I hope you're all enjoying a nice lazy Sunday :)

I'm having a great weekend so far - I went into London yesterday with a few people from work and we went wine tasting at this place called Vinopolis.  It was great fun!  You get a quick session showing you how to taste wine properly (I struggled with the slurping technique as first, but I got there in the end!) and then you have a card loaded up with electronic tokens, and you just pick a wine to taste, stick your card in the machine and it dispenses it into your glass.  And if you were in the right place at the right time, you could get the odd free glass as they changed the bottles lol.

Anyhoo, I promised you some more Viva La Nails products and that's exactly what I have for you today!

When Viva La Nails sent me some polishes to review (you can see that review here) they also sent a few nail art goodies.  One of these was a pot of glitter dust.  

I don't have a picture of the pot for you, because I got too excited to get in and get at the glitter.  But it's a 5g pot (it's the same size as some that I ordered on ebay last year, so it's a standard size) and you can see what it looks like here.  I just wanted to mention how good the packaging is though - in the past I've had glitter products arrive that have leaked everywhere, but this seals tight and also has a little plastic layer that you place over the top of your pot before putting the lid on.  So all your sparkliness is nice and secure.

On to the pictures!

I decided to create a simple design using tape.

Zig-zag-nail-art-Viva-La-Nails-glitter-dust-Azure-Sally-Hansen-Green-Tea-engagement-ring

I used Sally Hansen Green Tea for my base colour, and then I used some tape when the polish was dry to get the zig zag accent with the Viva La Nails zure Glitter Dust.

I did some dots of glitter on my thumb, but I made a rather amateur mistake.  I forgot to let the base colour dry before sprinkling glitter over for my dots.  Oops.

Zig-zag-nail-art-Viva-La-Nails-glitter-dust-Azure-Sally-Hansen-Green-Tea

The glitter is super fine (and super sparkly) so, as you can see, I didn't have any trouble getting clean lines and sharp corners with this.

And just because I got my ring back from the jewellers yesterday, here's another picture :)

Zig-zag-nail-art-Viva-La-Nails-glitter-dust-Azure-Sally-Hansen-Green-Tea-engagement-ring

You can see this product here, along with all the other colours.  Each pot is only £1.95 with free shipping if you spend over £25 (that's a lot of glitter).  Also, if you're in the UK, then your product should arrive the next day!


Monday 8 April 2013

Viva La Nails Polish

Hello again my lovely readers :)

My fiance (eeeee!) went back to sea again today, so I'm all on my lonesome!  I do have a wedding to plan though, so that should keep me entertained :)

It also means I have more time to paint my nails!  Today I have a new brand to share with you.  Viva La Nails is a European nail art website (don't worry - they ship worldwide!).  They've recently started some new nail polish ranges, and so I was contacted to ask if I'd like to review a few of them.  Prepare yourselves for lots of pictures.

First up are two polishes from the Garden of Colour range.


The bottles are 15ml (same size as OPI) and they cost £3.95.

Viva-La-Nails-Garden-of-Colour-Truth-or-Dare-swatch

This is Truth Or Dare.  I chose this polish because it looked like a lovely deep colour, but I didn't realise until it arrived that it's a flakie.  Swooooooon.

Viva-La-Nails-Garden-of-Colour-Truth-or-Dare-swatch

The polish is a gorgeous wine/burgundy colour, leaning a little brown in certain light, and packed full of shimmer.  The flakie glitters add this amazing glow in the polish that makes it look fire-y :)

Viva-La-Nails-Garden-of-Colour-Truth-or-Dare-swatch

The flakies shift from orange through to yellow and green.  So pretty....

Viva-La-Nails-Garden-of-Colour-Truth-or-Dare-swatch

Application was a dream.  Honestly, the formula on these was amazing.  I didn't need to do any clean up at all, the polish was very well-behaved and flowed lovely over the nail.  All these swatches are three coats with top coat.

Next up is the aptly named Creme Brulee.  Yeeeaars ago I had this manicure in my head that I wanted to do, but I needed a particular shade of yellow for it.  In the end, I made do with Rimmel Sunshine, because I just could not find the shade I wanted anywhere (although 'anywhere' back then was Superdrug and Boots - so young, so much still to learn lol).  This, my friends, is the colour.

Viva-La-Nails-Garden-of-Colour-Creme-Brulee-swatch

It reminds me of those slices of fake cheese that we have a barbecues :)

Viva-La-Nails-Garden-of-Colour-Creme-Brulee-swatch

The formula on this was as good as Truth Or Dare.  Yellows can be a bit of a pain to get opaque, I normally layer them over white because I can't be bothered applying five coats and still having VNL.  This, however, was perfectly opaque in three coats.  I think you'd get away with two to be honest, but I went for three because macro mode is very unforgiving :p


A quick mention of the brushes.  They're a medium size (similar to a Barry M) and hold a good amount of polish - I didn't have to re-dip and I didn't have blobs running down the brush.  Really easy to get a clean cuticle line with this.

So, massive bottles, gorgeous colours and fantastic formulas all for £3.95?  These get a massive thumbs up from me.

You can see the whole Garden Of Colour range here.

Lastly is a polish from the Colour It range.


These are gel polishes (i.e. ones that are set with UV light) and sell for £6.95.  This is shade 40.

I don't have much experience applying gel polish, so I did struggle a little with the thicker formula of this, so apologies for the messy cuticle line!  Definitely need more practice :)  The brush on this is wider than the one above, and the polish needs a little stir before you start painting.

Viva-La-Nails-Colour-Color-It-UV-gel-polish-40-swatch

The colour is lovely though, a pink-toned nude.  I want to call it blush?  This is two thin coats without any topcoat - super shiny.  If you're a fan of gel polish, it's worth taking a look at the Colour It range here - a much cheaper alternative to some other brands out there and a great selection of colours.

So far, I'm loving the quality of Viva La Nails' products.  I'm having a good old nose at what nail art products they have available now - I may have to treat myself.  Do you think I can use trial runs for my wedding manicure as an excuse to buy lots of stuff...?  (I should probably have a venue before I start planning my nails, but there we go!).

I was also sent a few nail art goodies to review, which I'll show you later in the week.  For now I shall just say this - prettyyyyyy.

What do you think of all these polishes?  Will you be giving Viva La Nails' products a go?

Saturday 6 April 2013

Hearts and Bows

Happy Saturday everyone!  I hope you're all enjoying your weekend so far.

I have another product from Born Pretty Store to show you today.  If you haven't visited the site before, Born Pretty Store has loads of nail art supplies, which are very reasonably priced and, in my experience thus far, great quality.

So the product I have to show you today are these pearl nail art decorations.  They come in a nice little case (with less potential for mess than the ones with the top that turns).

born-pretty-store-pearl-nail-art-decorations-barry-m

There are six different shapes, including hearts, bows and good old round pearls.  These are quite large though, and they do all have flat backs (beware curvy girls!).

This is the first look I created, using the white heart decoration.  I just want to make it clear that the pearls on my ring and little fingers are not the pearls from this set, these are smaller ones from a previous wheel I purchased.

born-pretty-store-heart-pearl-nail-art-decorations-barry-m

I had a good old Barry M fest, using Berry Ice Cream, Lemon Ice Cream, Blueberry Ice Cream, Peach Melba and Mint Green.  I added the stripes with a nail art pen and stuck on all my pearly bits with top coat.

As you can see, the heart is quite large and sticks up from my nail.  If you were wanting to wear it for a bit longer then sticking it on with nail glue would probably make it more secure (I can't use my nail glue because I used it once and now the lid's stuck...are they supposed to be single use or have I done something silly??).

born-pretty-store-bow-nail-art-decorations-barry-m

 A slightly different look here.  Obviously not particularly practical due to the size of the bow, but I think this would be cute for a night out or something (just think how cute your nails would look holding a little clutch bag lol).  Oh and this is Barry M Black by the way.

Here's a side shot to give you an idea of how much they stick out.


So, unfortunately, another product that's too big and flat to be practical to use on your nails.  However, I do think you can make some cute looks with these just for one night or something, if you can put up with the stickyoutness for a few hours.  I should add that there are plenty of each shape as well - about 20 of each.

If you like the look of these, you can see them on the Born Pretty website here.  They retail for $4.52 (£2.95) and shipping is free wherever you are in the world.

Don't forget, if you do decide to purchase these, or anything else, you can use the code LKL91 for 10% off.  Happy shopping!


Tuesday 2 April 2013

China Nails

Today was my first day back at work after my 11 days off (I did not appreciate getting up this morning, and I think my fiance appreciated my mood even less - I'm told I'm something of a bitch when I wake up).  I can't say I had a particularly productive day...far too distracted by telling anyone and everyone that I'm engaged lol.

Today I have a product to show you that I was sent by KKCenterHk.  They have a range of Bluesea nail decorations, in all sorts of shapes, colours and patterns.  These are 3D decorations, and I chose these Blue Flower ones, because they remind me of the china plates my Nanna used to have :)

You get two decorations in the pack.


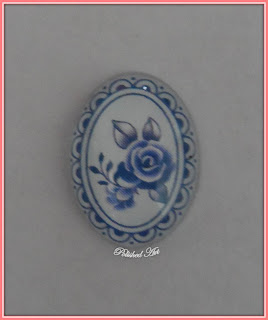
Here's a closer look at the pattern.  It's a very pretty rose :)  I like the shading.


And here's the look that I came up with.  Since there are only two decorations in the pack, you're pretty much limited to using them for one accent nail on each hand, although you could of course vary which nail this is and build different looks up around it.

KKCenterHk-Bluesea-Blue-Flower-nail-art-decoration-Barry-M-Sharpie

I used Barry M Matt White and then a blue Sharpie for the detail and the blue base.  I have to say, I'm a little bit in love with this pattern...

I stuck the decoration on with a little bit of topcoat blobbed on the back.  As you can see, it's quite large.  the length is just shy of a centimetre.

Unfortunately, as you can see below, for me this product is a bit of a no-go.


The back is totally flat, and on my super curved nails this was just never going to last.

Such a shame!  They are really pretty though, and if you have flatter nails then you'll be okay.  But if you're a curvy girl like me, then these just aren't for us I'm afraid!

KKCenterHk-Bluesea-Blue-Flower-nail-art-decoration-Barry-M-Sharpie

This product retails for $4 (about £2.65 according to Google).  If you have flatter nail beds, then they're worth a look :)

If you do decide to purchase these or any other products from KKCenterHk, you can use the discount code polishedart for 10% off.